Chili Cheese Enchiladas
How to make Chili Cheese Enchiladas
Ingredients:
1 lbs lean ground beef (93/7)
1 lbs lean ground turkey (99/1)
1/2 medium yellow onion, chopped
1 garlic clove, minced
2 bell peppers, chopped (1 green, 1 red)
2 cans diced Fire Roasted Tomatoes (14oz cans)
1 can tomato paste (6oz)
1 can can diced green chilies
1.5 cup beef broth
1 can BUSH’S BEST Mixed Beans in a Mild Chili Sauce – 15.5 Oz
1 Tbsp chili powder
1 Tbsp ground cumin
1 tsp salt
1 tsp pepper
For the Enchiladas:
8 Mission Carb Balance Flour Tortillas
1 cup (112g) shredded Cheddar Cheese
1 La Victoria Sauce Enchilada Green Mild Can – 10 Oz
3/4 cup (84g) shredded Monterey Jack Cheese
Instructions:
For the chili:
Turn instant pot to sauté, drizzle the bottom with olive oil just to avoid the meat sticking. Add garlic and cook until fragrant.
Add the ground turkey and ground beef to the pot and cook until browned but not fully cooked through.
While still in the sauté function add onions, bell peppers and all remaining ingredients. Stir together well.
Put on the lid and set to pressure cook for 30 minutes. You can let this self release all the way or quick release.
This will make 10 servings total. You will only use 3 servings of chili for the enchiladas. Reheat the chili throughout the week for other meals, or freeze for later.
For the enchiladas:
Preheat the oven to 350 degrees Fahrenheit.
Add 3 servings of chili (approx. 1170 grams) to a strainer. Remove most of the liquid and set aside.
In a 9 x 13 inch baking sheet pour a few spoonful’s of the chili liquid on the bottom.
Lay one tortilla out and add 1/8 of the chili, 2 Tbsp. (14g) cheddar cheese, roll up into a enchilada and place in the baking dish. Repeat with all 8 tortillas.
Note: for best accuracy weight your total drained chili and divide by 8. This will be the total meat mixture you add to each tortilla.
Once you have rolled all 8 tortillas pour the chili liquid you strained on top of enchiladas. Add the green enchilada sauce to the top.
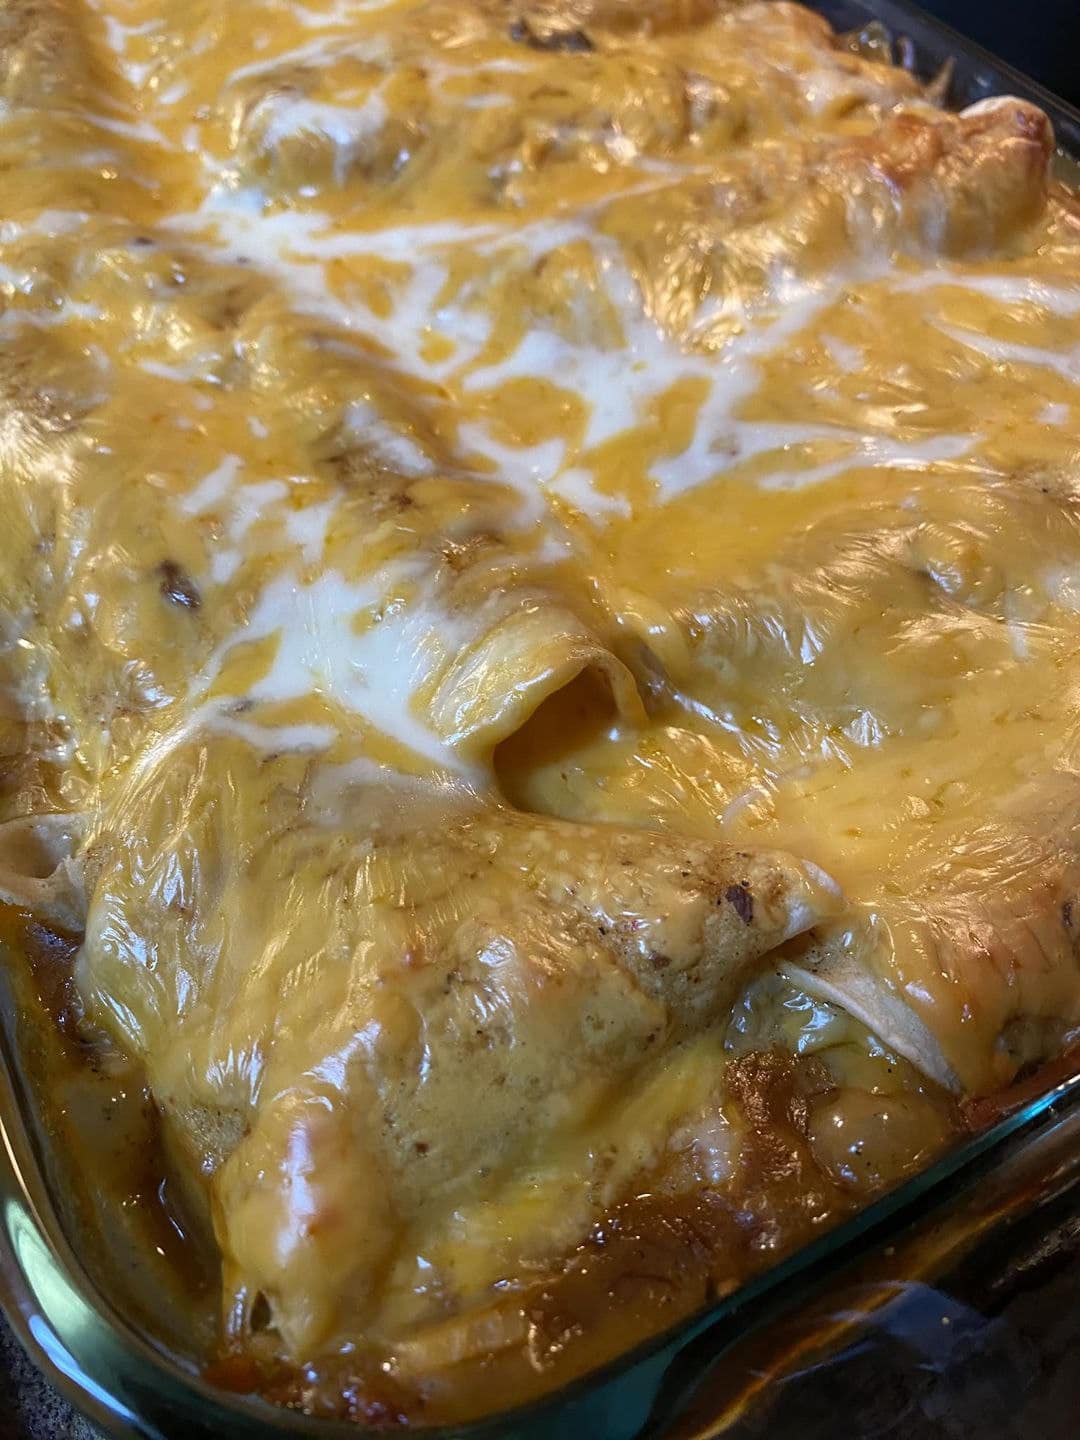
Cover with foil and bake for 25-30 minutes. Remove the foil and top with Monterey Jack cheese evenly over all 8 chili cheese enchiladas. Return to the oven without the foil and bake for an additional 10-15 minutes until the cheese is melted and the sauce is bubbling.
Remove from the oven and serve with toppings like red onion, Greek yogurt or sour cream, salsa, cilantro, avocado or jalapenos.
Nutrition Information:
SERVING SIZE: 1 enchilada
Calories: 350-400 kcal | Total Fat: 18-20g | Saturated Fat: 8-9g | Trans Fat: 0g | Cholesterol: 50-60mg | Sodium: 750-800mg | Total Carbohydrates: 23-26g | Dietary Fiber: 5-6g | Sugars: 2-3g | Protein: 22-25g
Frequently Asked Questions:
Can I use different types of meat for the chili in the recipe?
Yes, you can use other ground meats like chicken, pork, or a combination of meats according to your preference.
Adjust the cooking time accordingly.
Can I make the chili ahead of time and store it for later use?
Absolutely! You can make the chili in advance, refrigerate it in an airtight container, and use it for the enchiladas or other meals throughout the week.
It can also be frozen for longer storage.
Can I use canned beans with a different sauce for the recipe?
Yes, you can use canned beans with a different sauce if you can’t find the specified brand.
Choose beans with a mild chili sauce or any sauce that complements the enchiladas.
Are there any alternatives to flour tortillas for a gluten-free version?
If you need a gluten-free version, you can use corn tortillas instead of flour tortillas for the enchiladas.
Corn tortillas are naturally gluten-free.
Can I customize the level of spiciness in the chili?
Yes, you can adjust the spiciness of the chili by adding more or less chili powder and diced green chilies.
Feel free to experiment with the seasonings to suit your taste preferences.
Can I use different types of cheese for the enchiladas?
Yes, you can customize the cheese selection to your liking.
You can use different types of cheese, such as Mexican blend, pepper jack, or Colby jack, to add variety to the flavor.
Can I make the chili on the stovetop instead of using an instant pot?
Absolutely! If you don’t have an instant pot, you can make the chili in a regular pot or Dutch oven on the stovetop.
Simply simmer the ingredients until the meat is cooked through and the flavors are well combined.
How can I make the enchiladas less spicy?
To make the enchiladas less spicy, you can reduce or omit the diced green chilies in the chili and use a mild enchilada sauce.
Additionally, you can use less chili powder or use a mild chili powder.
Can I make the enchiladas ahead of time and bake them later?
Yes, you can assemble the enchiladas ahead of time and refrigerate them until you are ready to bake.
Just cover the baking dish with foil and store it in the fridge.
When you’re ready, bake them as instructed in the recipe.
Can I add more vegetables to the chili?
Certainly! Feel free to add more vegetables to the chili to enhance its nutritional value and taste.
You can include ingredients like corn, diced tomatoes, or black beans for additional flavor and texture.
Comments
Post a Comment